Openfire, Pidgin and Live Helper Chat configuration tutorial

Last modification: 2014-09-01 15:55:52

In this tutorial I will show how to configure Openfire and Live Helper Chat

Requirements

  1. Openfire installed server - http://www.igniterealtime.org/projects/openfire/
  2. Live Helper Chat

Configuring Openfire

  1. After you login to your Openfire admin interface click from top menu "Users/Groups"
    You should see:
  2. Now we should create two new users, one for Live Helper Chat, let's call it lhcbot and another one remdex it will be us. So after you have done that you should see window identical to above
  3. Now let's create a group chat where our lhcbot will send messages. For that navigate to "Group chat" from top menu and click create
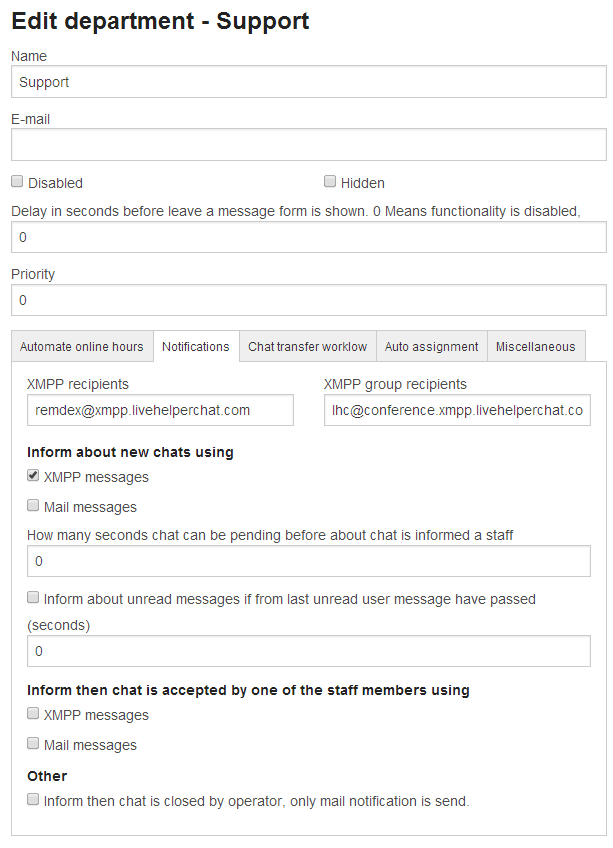
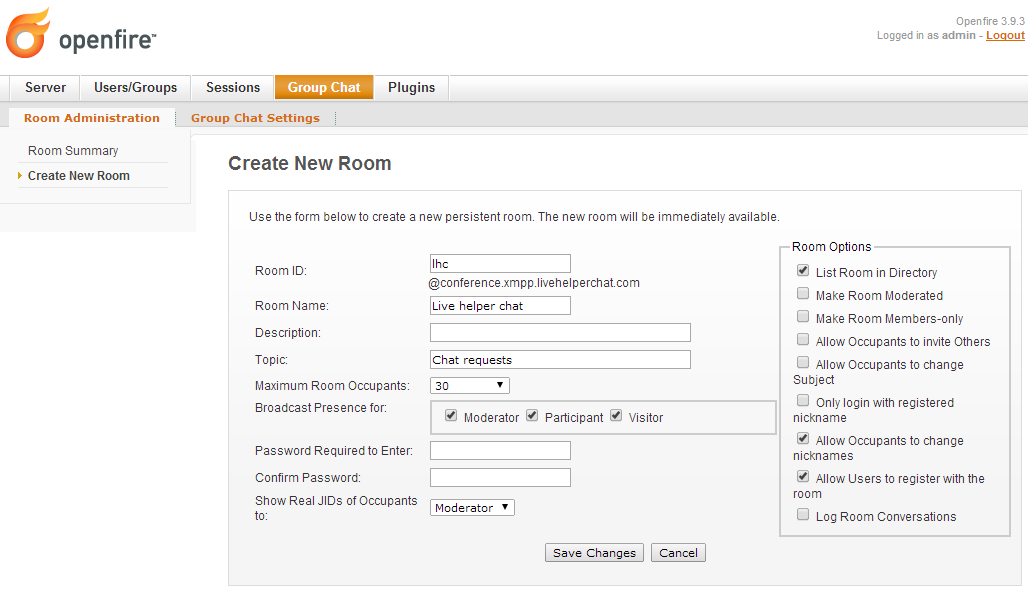
    Here we fill Room ID, Room Name, Description, Topic and just click save.
    Make sure that you server points conference.xmpp.youdomain.com and xmpp.youdomain.com to your server IP
  4. For testing purposes now you can download https://www.pidgin.im/ it's client for xmpp protocol. After you run first Click from top menu Accounts => Manage accounts and Add account. In add account page fill the form according to provided screenshot
  5. Now click "Buddies" from top menu and "Join a chat" and click "Room list" and click "Find Rooms" then you should see your room named lhc. Just check it and click Join
  6. So we are finished with Openfire and desktop client configuration

Configuring Live Helper Chat

  1. Now navigate to Configuration => Live help configuration => XMPP settings and fill xmpp settings. Settings should look like the following screenshot

    Don't forget to change host to your srever ip. Login - here we use previously created user lhcbot and set password. Also for testing purposes we set Individual recipient and test group recipient, we can separte by comma these recipients.
  2. Now just click Send test message and in your pidgin you should receive two messages one for as individual recipient another one in Chat room named lhc. lhc@conference.xmpp.livehelperchat.com/lhcbot (<chat_group_name>@server.address/<bot_username>)

    Now you should see messages similar to above one. Pay attention that chat variables are not changed. 
  3. Next we have to configure Department itself and set notification settings.
  4. Now juse save the settings. We now can try to initiate chat and you should receive notification about new chat request directly to Pidgin, also using online hours you can automate everything and you won't have to be online all the time. Just use Pidgin.
  5. We are done!!!

If you do not want spend time installing Openfire and configuring Live Helper Chat there is commercial offer for that

Goodluck and happy hacking :)

Support project

Developing application takes a lot of time. You can support application by donating. There is no company behind this application and it takes away my free time. Every donation matters and does not matter how small it is!


Paypal, one time donation
Monthly donation
Bitcoin
Skrill
remdex@gmail.com